Tuesday, August 31, 2004
Saturday, August 28, 2004
Springy Plugin
"Springythingy plugin, it does a kind of follower effect, but with proper springsand whatnot. It also has channel stuff implemented for those interested in how to go about those.
Check it out and let me know if this is useful to you.
The source is of course copyright me, but I'll give it away under a gnu license, as I would appreciate it that if someone does find a way to improve on it (Which I expect a blind monkey could do!) that they post the revised copy here..."
mgspring.zip
Check it out and let me know if this is useful to you.
The source is of course copyright me, but I'll give it away under a gnu license, as I would appreciate it that if someone does find a way to improve on it (Which I expect a blind monkey could do!) that they post the revised copy here..."
mgspring.zip
Saslite Long Hair Guide Modeling
PLUGIN
"Been a while, but here's a new finished lscript. This one automates the long hair sas-lite guide making tutorial I wrote for the tutorial section, plus does a few other little automations. This should make it a doddle to make long hair guides for your creatures. Let me know if there are any bugs, I think I've taken them all out but you never know!"
MGWizzywig.zip
"Been a while, but here's a new finished lscript. This one automates the long hair sas-lite guide making tutorial I wrote for the tutorial section, plus does a few other little automations. This should make it a doddle to make long hair guides for your creatures. Let me know if there are any bugs, I think I've taken them all out but you never know!"
MGWizzywig.zip
FBX conversation
"what follows is an edited conversation i had with a MB guru on msn
its interesting to see, and after the conversation, a light of understanding turned on so loudly, that i heard it
*3D-Mike ~**and you guys just have to press MERGE
***or rather, animate first, PLOT, SAVE and press MERGE
***it works
jayreef, says: (9:49:46 pm)
***but if i rigg a model in maya, export as an fbx, animate it, save that as fbx
***can a LW guy open it , and run with it
3D-Mike ~
***you should NOT OPEN an FBX
***use the FBX as a shadowfile that holds your rig so you can import (merge) motion data from it
***just set up the ready-for-render-file in any package
***then create the FBX
***setup the rig, animate
***then go back to the final file
***NOT the FBX
***the final file
***then MERGE the FBX
***only the motion data will be imported
***thats the beauty
***people often mistake FBX for a multe platform format and in a way it is
***but NOT if you want to use it as a motion carrier"
its interesting to see, and after the conversation, a light of understanding turned on so loudly, that i heard it
*3D-Mike ~**and you guys just have to press MERGE
***or rather, animate first, PLOT, SAVE and press MERGE
***it works
jayreef, says: (9:49:46 pm)
***but if i rigg a model in maya, export as an fbx, animate it, save that as fbx
***can a LW guy open it , and run with it
3D-Mike ~
***you should NOT OPEN an FBX
***use the FBX as a shadowfile that holds your rig so you can import (merge) motion data from it
***just set up the ready-for-render-file in any package
***then create the FBX
***setup the rig, animate
***then go back to the final file
***NOT the FBX
***the final file
***then MERGE the FBX
***only the motion data will be imported
***thats the beauty
***people often mistake FBX for a multe platform format and in a way it is
***but NOT if you want to use it as a motion carrier"
Friday, August 27, 2004
Wednesday, August 25, 2004
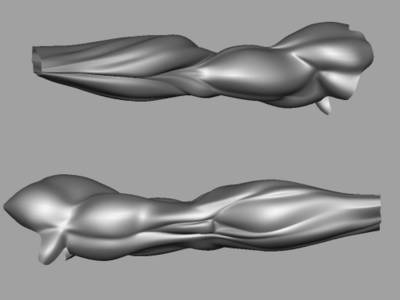

Great Hair
Done in Max, but it's pretty cool.
Not Sas type hair but modeled shape cartoony hair.
There's wires too in the thread, and hi-res pics, so check it out.
Not Sas type hair but modeled shape cartoony hair.
There's wires too in the thread, and hi-res pics, so check it out.
Rigging - Larry Splinegod hints
Character animation is broken up into stages. The blocking out stage can be done with versions of the characterst that are like chess pieces. Theyre moved around to get a feel for the overall timing.
When the actual character animation starts the character animators typically arent concerned about deformations. Animation is about timing, weight, acting etc etc rather then focusing on technical issues like deformations. This requires that the rig be animatable, that it gives fast feedback and can be posed quickly and easily. You dont care about deformations at this stage and in fact the animating and deforming aspects should be separated. The rig shouldnt require a lot of reposing once parts are posed. The rig should also be stable in between poses. Once the character animator is done animating the character technical animators take over and apply the motions to a more complex rig that has higher poly counts, cloth, skin, muscle and other dynamics. They insure that the character deforms properly and they do whatever it takes to make sure it does this. Sometimes that means creating morphs or even tweaking points by hand. They will add other types of deformers to help out as well. At this point you definately wont see realtime feedback on the rig. If animation changes need to be done the character animators will do it on the chopped up rig. The motions will again be applied to the more complex rigs. Sometimes there may be multiple rigs, with the data from the previous rigs being applied to even more complex ones. If it sounds tedius its because it is. This is also why that large Maya based studios have lots of speclists. Lightwave people tend to be their own TDs.
Rather then have multiple rigs in LW I tend to have a hybrid rig. My chopped up rig and my high rez rig share the same bones. I have some scripts that allow me to change my rig between an Animate Mode and a Deform Mode.
When I run my script for Animate mode, the high rez mesh is hidden, subpatch levels are dropped to 0, subdivision order is set to first, bounding box threshold is set to a lower value and I may also opt to disable all deformations. At the same time all the chopped up pieces which are invisible and parented to the proper bones are made visible. When I do this my rig animates very quickly in Layout.
When I wish to test deformations my Deform Mode script makes the chopped up pieces invisible, makes the high rez subpatched character visible, sets the subpatch level to 2 or 3, sets the subdivision order to last and enables deformations. I may choose to leave the bounding box threshold at a low value. In this mode I can see how my character is deforming. The feedback in this mode is not realtime but I can quickly switch between both modes to do what I need to do.
With that said, one thing nice about living in LA is getting to meet lots of cool people in this business. One of them is Colin Cohen. Colin does character work and is an awesome programmer. After some discussion a couple of weeks ago Colin wrote a new plugin that can copy motions from one rig to another. I would definately recommend his plugins, many of which really streamline the character rigging/animation process.
Heres a link to his site. http://cohen-plugs.tripod.com/
When the actual character animation starts the character animators typically arent concerned about deformations. Animation is about timing, weight, acting etc etc rather then focusing on technical issues like deformations. This requires that the rig be animatable, that it gives fast feedback and can be posed quickly and easily. You dont care about deformations at this stage and in fact the animating and deforming aspects should be separated. The rig shouldnt require a lot of reposing once parts are posed. The rig should also be stable in between poses. Once the character animator is done animating the character technical animators take over and apply the motions to a more complex rig that has higher poly counts, cloth, skin, muscle and other dynamics. They insure that the character deforms properly and they do whatever it takes to make sure it does this. Sometimes that means creating morphs or even tweaking points by hand. They will add other types of deformers to help out as well. At this point you definately wont see realtime feedback on the rig. If animation changes need to be done the character animators will do it on the chopped up rig. The motions will again be applied to the more complex rigs. Sometimes there may be multiple rigs, with the data from the previous rigs being applied to even more complex ones. If it sounds tedius its because it is. This is also why that large Maya based studios have lots of speclists. Lightwave people tend to be their own TDs.
Rather then have multiple rigs in LW I tend to have a hybrid rig. My chopped up rig and my high rez rig share the same bones. I have some scripts that allow me to change my rig between an Animate Mode and a Deform Mode.
When I run my script for Animate mode, the high rez mesh is hidden, subpatch levels are dropped to 0, subdivision order is set to first, bounding box threshold is set to a lower value and I may also opt to disable all deformations. At the same time all the chopped up pieces which are invisible and parented to the proper bones are made visible. When I do this my rig animates very quickly in Layout.
When I wish to test deformations my Deform Mode script makes the chopped up pieces invisible, makes the high rez subpatched character visible, sets the subpatch level to 2 or 3, sets the subdivision order to last and enables deformations. I may choose to leave the bounding box threshold at a low value. In this mode I can see how my character is deforming. The feedback in this mode is not realtime but I can quickly switch between both modes to do what I need to do.
With that said, one thing nice about living in LA is getting to meet lots of cool people in this business. One of them is Colin Cohen. Colin does character work and is an awesome programmer. After some discussion a couple of weeks ago Colin wrote a new plugin that can copy motions from one rig to another. I would definately recommend his plugins, many of which really streamline the character rigging/animation process.
Heres a link to his site. http://cohen-plugs.tripod.com/
Tuesday, August 24, 2004
REF Techniques page
Info on the various techniques he used on "REF"
(From his old web page.)
- interface customisation - changing menu contents and keyboard shortcuts,
- character modeling - modeling in SubPatch mode,
- character rigging - bskeleton setup, bone weighting, preparing a "base" scene with a character model ready to animate,
- IK/FK blending - advanced character rig which was built specially for fight sequences purposes,
- cloth animation with Soft Body Dynamics - objects supposed to be deformed with Soft Body Dynamics have to follow some rules,
- Setting - modeling and texturing a setting object,
- Texturing - description based on character's head texturing process,
- Rendering - rendering process of a sample animation frame,
- Screenshots - well, some screenshots of Lightwave3D interface.
(From his old web page.)
- interface customisation - changing menu contents and keyboard shortcuts,
- character modeling - modeling in SubPatch mode,
- character rigging - bskeleton setup, bone weighting, preparing a "base" scene with a character model ready to animate,
- IK/FK blending - advanced character rig which was built specially for fight sequences purposes,
- cloth animation with Soft Body Dynamics - objects supposed to be deformed with Soft Body Dynamics have to follow some rules,
- Setting - modeling and texturing a setting object,
- Texturing - description based on character's head texturing process,
- Rendering - rendering process of a sample animation frame,
- Screenshots - well, some screenshots of Lightwave3D interface.
REF animation site
HERE is the spinquad where he talks about a new plugin, "Surpasses" (layers in layout:
(See also "ref" part of above site)
"Generally speaking Surpasses allow You to have multiple layout "layers", they are kind of scene morphs. You have Your basic scene called "base" and layers (morphs) are applied over it. Layer can include any set of items and various properties like antialiasing level, ray trace flags, etc.
Let me give You an example. You are working on a scene in which You set some high quality render settings. That is fine, but You need to fine tune some part of scene. Typically You would need to hide parts that You don't need and change render settings to preview quality to see results faster. Then, You would need to set settings back to high quality for final render.
With Surpasses, You just create a separate "preview" layer, with only those parts of scene You want to see and with low quality settings in it. Whenever You switch to this layer You will be able to test right away and then simply switch back to base when You're done.
Another example could be working with rigs, You can have different set of controls as separate layers and switch between them as needed, this way You don't have to see all controls at once cluttering view.
Surpasses are interactive and integrated within LW which means the effects of switching layers are visible both in openGL and in render. It also works with plugins like FPrime.
There are many more features in progress and You can be sure I'll tell You about them when whey are working as expected. I'm pretty excited with development of Surpasses and I hope to deliver a good tool to You, however the tool is still in development phase so some things may change."
(See also "ref" part of above site)
"Generally speaking Surpasses allow You to have multiple layout "layers", they are kind of scene morphs. You have Your basic scene called "base" and layers (morphs) are applied over it. Layer can include any set of items and various properties like antialiasing level, ray trace flags, etc.
Let me give You an example. You are working on a scene in which You set some high quality render settings. That is fine, but You need to fine tune some part of scene. Typically You would need to hide parts that You don't need and change render settings to preview quality to see results faster. Then, You would need to set settings back to high quality for final render.
With Surpasses, You just create a separate "preview" layer, with only those parts of scene You want to see and with low quality settings in it. Whenever You switch to this layer You will be able to test right away and then simply switch back to base when You're done.
Another example could be working with rigs, You can have different set of controls as separate layers and switch between them as needed, this way You don't have to see all controls at once cluttering view.
Surpasses are interactive and integrated within LW which means the effects of switching layers are visible both in openGL and in render. It also works with plugins like FPrime.
There are many more features in progress and You can be sure I'll tell You about them when whey are working as expected. I'm pretty excited with development of Surpasses and I hope to deliver a good tool to You, however the tool is still in development phase so some things may change."
Monday, August 23, 2004
Saturday, August 21, 2004
Animation tutes page
- Taking the computer out of computer animation
- IK and FK
- Weight Shifts
- Understanding curves
- Figure 8 - arm swings
and more coming
- IK and FK
- Weight Shifts
- Understanding curves
- Figure 8 - arm swings
and more coming
Rigging a hand
In the thread, Dan Ablan suggests:
"Start at the wrist. Then, place one for the base of the hand, another for the palm. From the palm, branch out to the first finger. Build each finger hierarchy from the palm bone.
If you're using LW8, run IK Boost to animate the fingers. Lock the base wrist bone.
The other thing you might want to check is weighting on the fingers. Since the fingers are close together, the bones can influence geometry near them. Weighting controls the bone's influence to what you specify."
"Start at the wrist. Then, place one for the base of the hand, another for the palm. From the palm, branch out to the first finger. Build each finger hierarchy from the palm bone.
If you're using LW8, run IK Boost to animate the fingers. Lock the base wrist bone.
The other thing you might want to check is weighting on the fingers. Since the fingers are close together, the bones can influence geometry near them. Weighting controls the bone's influence to what you specify."
Friday, August 20, 2004
Random Select lscript
Random Select

This modeler script selects points or polygons randomly. You can
adjust the amount with a percent value.
Download: RandomSelect.lsc
9 KB
After installing, you find this script under
"Additional/RobZ_RandomSelect"
This modeler script selects points or polygons randomly. You can
adjust the amount with a percent value.
Download: RandomSelect.lsc
9 KB
After installing, you find this script under
"Additional/RobZ_RandomSelect"
Thursday, August 19, 2004
Smartmorph 1.0 Released
And here's a newtek forum thread singing it's praises and inviting questions
Wednesday, August 18, 2004
Radiant level editing tools
Dunno if you've seen this, if it's useful, or if you even care.
But I've been using it a fair bit of late for my gaming and thought I would share.
But I've been using it a fair bit of late for my gaming and thought I would share.
Squash and stretch rigs in LW
Q-"How do I get my hierarchy to squash and strech correctly?"
A-"Painful but what you can do is parent an intermediate bone at every joint which has an expression of the form (1/['parent_bone_name'.Scale.Z]) then parent your child bone to that. then as the parent bone squashes and stretches, the intermidiate bone compensates.
Look at the scene below." NOTE rig file attached
"How simple!!! Thanks!!! (my attempts where much more complicated)
You forgot to turn off IK on the intermediate bone though. After I did that it worked like a charm. I just copied the scale of the root bone to the child using another expression and now I have a fully functional squash stretch IK rig :)"
A-"Painful but what you can do is parent an intermediate bone at every joint which has an expression of the form (1/['parent_bone_name'.Scale.Z]) then parent your child bone to that. then as the parent bone squashes and stretches, the intermidiate bone compensates.
Look at the scene below." NOTE rig file attached
"How simple!!! Thanks!!! (my attempts where much more complicated)
You forgot to turn off IK on the intermediate bone though. After I did that it worked like a charm. I just copied the scale of the root bone to the child using another expression and now I have a fully functional squash stretch IK rig :)"
Tuesday, August 17, 2004
T4D "problem page"
A site with "how to" info on T4D rigging tools V2.
NOTE that this site is not by T4D, but kevinmcpoland, who is just trying to fill in some of the gaps in T4D's documentation.
Covers setup in Layout (T4D covered modeler only) and animation.
It covers kevinmcpoland's way of doing things - which may change when the next lot of T4D tute vids come out.
NOTE that this site is not by T4D, but kevinmcpoland, who is just trying to fill in some of the gaps in T4D's documentation.
Covers setup in Layout (T4D covered modeler only) and animation.
It covers kevinmcpoland's way of doing things - which may change when the next lot of T4D tute vids come out.
JB Plug-in Collection
CenterView centers the Layout viewport on the current item.
Points Distance measure the exact distance between two points.
Y.A.P.M. creates default project folders and scene.
Save Scene & Objects does exactly that, all at once.
RT SplineRols creates spiral splines in real-time.
RT LatheDraw creates real-time lathed shapes.
Clear Scene Plus does that and sets up various attributes.
Add Nulls adds any number of nulls to your scene.
Add Goals is a simple script for IK chain construction.
Points Distance measure the exact distance between two points.
Y.A.P.M. creates default project folders and scene.
Save Scene & Objects does exactly that, all at once.
RT SplineRols creates spiral splines in real-time.
RT LatheDraw creates real-time lathed shapes.
Clear Scene Plus does that and sets up various attributes.
Add Nulls adds any number of nulls to your scene.
Add Goals is a simple script for IK chain construction.
South Park style replacement mouth discussion
"I would have used the object replacement plugin "Object List". It needs a textfile to work. and if you make the vocal dopesheet in the way the plugin needs its textfile, you have 2 thngs done at once. other advantages are that the objects don´t have to have the same name, nor the same point count."
Saturday, August 14, 2004
align to rail
"Change the attached file's suffix to .ls and it will work.
A cheapo site will soon exist to house the scripts..."
A cheapo site will soon exist to house the scripts..."
Thursday, August 12, 2004
Wednesday, August 11, 2004
MB animate extra limbs with a little bit of dynamics
Here is an extract from the thread:
**note there is an fbx example file for download there also**
"The simplest way to animate extra limbs like tails, wings and hair that are supposed to move with a little bit of dynamics is to use a trusty combination of IK and Relation (damping) constraints.
1. Create a couple of additional markers on the skelton nodes.
Double click in Asset Browser>Elements>Marker and click on the node. Normally the markers should be spaced 1-3 nodes apart if it's a long tail. These will serve as IK Effectors. You'll also need to create IK Hints, generally half way between the markers away from the chain. Right click when you're done.
2. Parent the markers to a node above the first joint you're planning to affect with the Effector. Ex: for hair, you're likely to choose the head node, for a tail> hips, etc.
3. Create an IK constraint for each IK effector you created.
Drop the First and last bone to be affected by the marker, the Effector, the Hint and Optionally the Floor level marker for detection. Snap the constraint.
4. Create a Relation constraint for damping.
Drop each Effector and Hint inside once as a Sender and once as a reciever. Between the two add a 3D damping operator (Other> Damping 3D) and connect the Translation chanel through it. Set the damping value for each effector/hint. The general rule is the further the effector is down the chain the bigger the value and the hints have less damping than the efectors, but all of this depends on the desired result. Play around.
Tips.
You can add a feeling of weight on a tail for example by moving the Effectors below the floor level once you set the constraints.
The IK chains can be broken down to short 1-limb sections for more control.
The limb nodes can be dropped into the Props section of the character mapping list (assuming you have less than 5). This will plot the animation to them along with the main bones when you select Plot Character.
You can use the setup for a base animation, plot to all the IK Effectors/Hints and then keyframe on top for more control.
Included is a simple file of the basic setup.
The damping can be expanded to include gravity and collision "simulation" by adding some additional markers and constraints to the hierarchy. It is only a simulation, but works well in many cases. I'll try to post more on that in the thread on cloth simulation soon."
**note there is an fbx file for download there also
**note there is an fbx example file for download there also**
"The simplest way to animate extra limbs like tails, wings and hair that are supposed to move with a little bit of dynamics is to use a trusty combination of IK and Relation (damping) constraints.
1. Create a couple of additional markers on the skelton nodes.
Double click in Asset Browser>Elements>Marker and click on the node. Normally the markers should be spaced 1-3 nodes apart if it's a long tail. These will serve as IK Effectors. You'll also need to create IK Hints, generally half way between the markers away from the chain. Right click when you're done.
2. Parent the markers to a node above the first joint you're planning to affect with the Effector. Ex: for hair, you're likely to choose the head node, for a tail> hips, etc.
3. Create an IK constraint for each IK effector you created.
Drop the First and last bone to be affected by the marker, the Effector, the Hint and Optionally the Floor level marker for detection. Snap the constraint.
4. Create a Relation constraint for damping.
Drop each Effector and Hint inside once as a Sender and once as a reciever. Between the two add a 3D damping operator (Other> Damping 3D) and connect the Translation chanel through it. Set the damping value for each effector/hint. The general rule is the further the effector is down the chain the bigger the value and the hints have less damping than the efectors, but all of this depends on the desired result. Play around.
Tips.
You can add a feeling of weight on a tail for example by moving the Effectors below the floor level once you set the constraints.
The IK chains can be broken down to short 1-limb sections for more control.
The limb nodes can be dropped into the Props section of the character mapping list (assuming you have less than 5). This will plot the animation to them along with the main bones when you select Plot Character.
You can use the setup for a base animation, plot to all the IK Effectors/Hints and then keyframe on top for more control.
Included is a simple file of the basic setup.
The damping can be expanded to include gravity and collision "simulation" by adding some additional markers and constraints to the hierarchy. It is only a simulation, but works well in many cases. I'll try to post more on that in the thread on cloth simulation soon."
**note there is an fbx file for download there also
Wednesday, August 04, 2004
Download an animation I did in MB
HERE
It is compressed in the RAR format. This is not meant as a demo of what I can do in Motionbuilder (those are coming next) it's just a render out of work I did while learning the Motionbuilder workflow.
Boring details:
The model is the surfer dude who comes in the tutorial files from the Kaydara website. The audio is from the 10 second club archives (April 04).
I'll save a thorough breakdown of the process, with how long each stage took, for the first proper demo/study .... coming soon !
It is compressed in the RAR format. This is not meant as a demo of what I can do in Motionbuilder (those are coming next) it's just a render out of work I did while learning the Motionbuilder workflow.
Boring details:
The model is the surfer dude who comes in the tutorial files from the Kaydara website. The audio is from the 10 second club archives (April 04).
I'll save a thorough breakdown of the process, with how long each stage took, for the first proper demo/study .... coming soon !
Monday, August 02, 2004
Spinning Lights discussion (cgtalk)
Seems to be explained how to use it very well here. Well worth a look.
Links also to this one:
Spinning Light Rig v1.1 on Newtek forum:
"Well, skylight rigs are the "next best thing" to rendering with global illumination (A.K.A. Radiosity). It simulates the effect of light coming from the atmosphere. The sun will give you direct lighting, but the sun also illuminates all the particles in the atmosphere, and this light bounces back to us, giving us higly diffused (un-focused) shadows. So if you have a blue sky, set your sky lights to be the same colour then add a sun (key) light and you got a quickly-lit outdoor scene. Radiosity gives you the effect of bounced lights, so that will have a quality edge over this rig. But the render speed more than makes up for it. Radiosity is many times slower."
Links also to this one:
Spinning Light Rig v1.1 on Newtek forum:
"Well, skylight rigs are the "next best thing" to rendering with global illumination (A.K.A. Radiosity). It simulates the effect of light coming from the atmosphere. The sun will give you direct lighting, but the sun also illuminates all the particles in the atmosphere, and this light bounces back to us, giving us higly diffused (un-focused) shadows. So if you have a blue sky, set your sky lights to be the same colour then add a sun (key) light and you got a quickly-lit outdoor scene. Radiosity gives you the effect of bounced lights, so that will have a quality edge over this rig. But the render speed more than makes up for it. Radiosity is many times slower."
Texture refreshing plugin
Assign it to a hotkey and it will update all your textures. Make a change in photoshop, save, back to LW (modeler OR layout) and refresh the textures, there's your update. This will take a lot of the tedium out of texturing.
UPDATE: be aware of some (as yet unconfirmed) concerns raised on FLAY
"There's a bug with replace image. And this plugin becomes a dangerous thing because of that bug. When you do replace image (or use this plugin) to refresh textures few times, surfaces which have different textures on different channels get these textures replaced randomly. It's known LW bug and it wasn't fixed in LW8."
UPDATE: be aware of some (as yet unconfirmed) concerns raised on FLAY
"There's a bug with replace image. And this plugin becomes a dangerous thing because of that bug. When you do replace image (or use this plugin) to refresh textures few times, surfaces which have different textures on different channels get these textures replaced randomly. It's known LW bug and it wasn't fixed in LW8."
Sunday, August 01, 2004
BBC animation initiative
CAN YOU CREATE CULT ANIMATED CHARACTERS THAT WILL WOW BBC THREE VIEWERS?
If you've always had a burning desire to see your animation on screen then now's the time to act.
We're on the look out for short animated films that have the potential to grow into successful series.
They'll have a distinctive visual style, strong stories and appeal to BBC Three's 24-35 year old audience.
The overall winner will get their film screened on BBC Three and funding to develop a series of their animation.
If you've always had a burning desire to see your animation on screen then now's the time to act.
We're on the look out for short animated films that have the potential to grow into successful series.
They'll have a distinctive visual style, strong stories and appeal to BBC Three's 24-35 year old audience.
The overall winner will get their film screened on BBC Three and funding to develop a series of their animation.
MB 5 to MB 6 upgrade around $250 US
Michel Besner of Kaydara says in this 3DBuzz thread:
"Upgrade price from MB5 STD to MB6 STD should be around $250USD. This will be officially announced when we are closer to shipping MB6 ..."
"Upgrade price from MB5 STD to MB6 STD should be around $250USD. This will be officially announced when we are closer to shipping MB6 ..."
Lipsync MB 5.5 <-> LW 8 - part 3
Today I found that automating with the voice device and then going in to key expressions, offsets and general tweaking over the top is tricky, so I made up step by step instructions and a troubleshooting list for Motionbuilder lip sync workflow, including a naming convention (yes another one) for Motionbuilder files to indicate where they are in the pipeline so you know what can be done with them, what is established and what still needs to be done to make use of the file in any particular way. The workflow is a little convoluted but if you keep track of everything there are no hiccups.
If you need to use a character with a different audio file, you grab the version with the appropriate letter in the file name, and away you go. Need to pick up where you left off with a character who's been through the voice device, tweaked, plotted and keyframing was begun, but you're dissatisfied with the Voice device, go back a step according to the filenames and run it back through the tweaking process, and plot again. Sweet. This should save a lot of headaches, you know the ones, it's 2am, you've done 6 hours work, and the model's stopped talking...
If you need to use a character with a different audio file, you grab the version with the appropriate letter in the file name, and away you go. Need to pick up where you left off with a character who's been through the voice device, tweaked, plotted and keyframing was begun, but you're dissatisfied with the Voice device, go back a step according to the filenames and run it back through the tweaking process, and plot again. Sweet. This should save a lot of headaches, you know the ones, it's 2am, you've done 6 hours work, and the model's stopped talking...
Saturday, July 31, 2004
Pose Controller v0.9
Pose Controller is a master plug-in that allows you to load, blend and save poses from a library to any skeletal structure. Includes mirroring and blending functions in a non-modal interface.
UPDATE
Poses help thread:
Further Pose discussion
- negative frames storage discussion
- lscript pose retrieval automation
UPDATE
Poses help thread:
Further Pose discussion
- negative frames storage discussion
- lscript pose retrieval automation
Lipsync MB 5.5 <-> LW 8 - part 2
Digging deeper I've learnt how to do the next stage: after tweaking the automated pass, tidying that and then manually keyframing on a seperate layer.
Immediately after the auto Lipsync you can plot it (dropping the frames onto the character) and then Edit those keyframes in the Fcurves window (deleting anomolies caused by pops in the audio, etc.) And THEN, start keyframing in a separate layer. The layers are merged at the end of the process, before exporting to another app, but the layer feature is awesome for obvious reasons.
It would be great if you could send the plotted animation from the Voice device (automated lipsync) to the Story window (big workflow enhancement new to Motionbuilder 5) but on the forums the Kaydara app monkeys are saying facial animation is something they recognise as needing work, and MB6 is launching at the Sigraph or Seinfield or Sigmund the Sea Monster or something, so that's good news assuming they do an upgrade deal. Which I'd assume they will the way they market MB.
Audio offset is a great tweak tool, doesn't seem to work in render from MB for me, posed question on the Kaydara forums, stay tuned...
Immediately after the auto Lipsync you can plot it (dropping the frames onto the character) and then Edit those keyframes in the Fcurves window (deleting anomolies caused by pops in the audio, etc.) And THEN, start keyframing in a separate layer. The layers are merged at the end of the process, before exporting to another app, but the layer feature is awesome for obvious reasons.
It would be great if you could send the plotted animation from the Voice device (automated lipsync) to the Story window (big workflow enhancement new to Motionbuilder 5) but on the forums the Kaydara app monkeys are saying facial animation is something they recognise as needing work, and MB6 is launching at the Sigraph or Seinfield or Sigmund the Sea Monster or something, so that's good news assuming they do an upgrade deal. Which I'd assume they will the way they market MB.
Audio offset is a great tweak tool, doesn't seem to work in render from MB for me, posed question on the Kaydara forums, stay tuned...
Lipsync MB 5.5 <-> LW 8 - part 1
I spent all yesterday doing a tute for Motionbuilder automated lip sync with the Voice Device, and took a lot of notes on the workflow to make sure I can do it again without any hiccups. The automation is pretty amazing, you can tweak it in many different ways to an extrodinary level of detail. Then once you're happy with the automation, plot it to the character and keyframe over the top in a different layer for expressions and offset.
Started a workflow sheet for modelers preparing character models in Lightwave for this pipeline. It will outline:
Phonemes and Expressions
- a minimum, then expanding on that for characters requiring more expressive face animation, more dialogue intensive, bigger parts etc
- clear description of phonemes using examples
Naming Convention
- so the models can be plugged into Motionbuilder and work, also saving time trying to track down oddly-named morphs
Also going to work up some demos/studies, logging hours to each stage
- setup
- first pass automated
- second pass keyframed
- final
I was blown away by Motionbuilder's power. In the last hour of a long day I worked out how go into a scene already set up with automated lip sync, replace the audio file with a different one, and tweak the settings to suit that file. 10 second audio files (from 10 second club archives.) So with a saved Motionbuilder file with the character model set up with phonemes etc all rigged up, we're talking about the first automated pass for a new audio take taking less than an hour. If it was the same actor and recording conditions for each piece of dialogue for a specific character, you could assume this time would be even less.
Started a workflow sheet for modelers preparing character models in Lightwave for this pipeline. It will outline:
Phonemes and Expressions
- a minimum, then expanding on that for characters requiring more expressive face animation, more dialogue intensive, bigger parts etc
- clear description of phonemes using examples
Naming Convention
- so the models can be plugged into Motionbuilder and work, also saving time trying to track down oddly-named morphs
Also going to work up some demos/studies, logging hours to each stage
- setup
- first pass automated
- second pass keyframed
- final
I was blown away by Motionbuilder's power. In the last hour of a long day I worked out how go into a scene already set up with automated lip sync, replace the audio file with a different one, and tweak the settings to suit that file. 10 second audio files (from 10 second club archives.) So with a saved Motionbuilder file with the character model set up with phonemes etc all rigged up, we're talking about the first automated pass for a new audio take taking less than an hour. If it was the same actor and recording conditions for each piece of dialogue for a specific character, you could assume this time would be even less.
Character Modelling Vid Tute - Colin Larkin's
Step by step really well broker-down tute, starts with the very basics (like "move tool") but is worth checking out as he goes right into each relevant tool, then later poly flow and edge tools. Lots of little vids around 2 meg each.
Thursday, July 29, 2004
Monday, July 26, 2004
Low Poly Cars
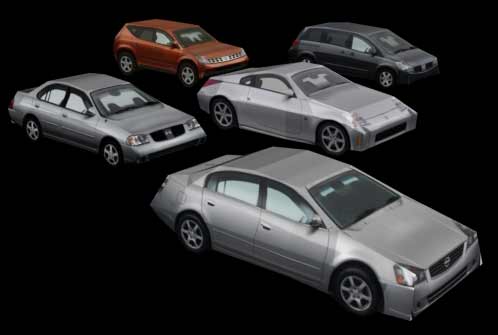
I made these for Shirow Project. Looking at them full screen I found I was tweaking them endlessly, but they will be way in the background so look fine for that purpose. Still to do spec reflec and dirt maps.
When my 3 yr old got up today I said look I made you a car. He said thanks and made me "drive" it around on the monitor for 45 minutes until I wished I could just will myself to die.
MB pose to pose
if you go too animation>pose control
when the box opens, and you have the character posed, click the create button. the pose is stored, once you want to have the character in the pose again, hit the paste button in the pose control box. say you have 3 poses stored. make sure full body parts is selected in character controls > paste the first pose> key it>move the time slider a bit>paste pose 2>key it > time slider move it> paste pose 3> key it
play back the animation
when the box opens, and you have the character posed, click the create button. the pose is stored, once you want to have the character in the pose again, hit the paste button in the pose control box. say you have 3 poses stored. make sure full body parts is selected in character controls > paste the first pose> key it>move the time slider a bit>paste pose 2>key it > time slider move it> paste pose 3> key it
play back the animation
Friday, July 23, 2004
Rigging tute videos
Rigging the Clavicle, Shoulder and Upper Arm
and
Rigging the Spine
"These are not "beginner guides." These are for people who have done some rigging and want to learn some more advanced techniques."
Note also watch XP trying to rename the file to .mov when you download. The extensions should remain .mp4 or the video won't play. In download window set "file type" from quicktime to "all files" and add ".mp4" extension, then download and it will play fine.
and
Rigging the Spine
"These are not "beginner guides." These are for people who have done some rigging and want to learn some more advanced techniques."
Note also watch XP trying to rename the file to .mov when you download. The extensions should remain .mp4 or the video won't play. In download window set "file type" from quicktime to "all files" and add ".mp4" extension, then download and it will play fine.
Wednesday, July 21, 2004
Monday, July 19, 2004
EASY IK/FK blending
Check it out. He's talking about writing a tute, doesn't sound too hard though from the Newtek forum link.
UPDATE: Tudor has updated that Newtek thread, and also added to the Spinquad rigging thread
DOWNLOAD Tudor's example file HERE
"The only downside with this is that the hand deform bone and the arm deform bones are not connected, so you cannot get proper joint compensation or muscle bulging..
Forgot to mention this in the last post.
the FK (animation) chain should be set to 0% strenght exept for the hand.
the deform chain should be the deforming chain up to the hand.
Ofcourse the IK chain should not influence anything at all."
UPDATE: Tudor has updated that Newtek thread, and also added to the Spinquad rigging thread
DOWNLOAD Tudor's example file HERE
"The only downside with this is that the hand deform bone and the arm deform bones are not connected, so you cannot get proper joint compensation or muscle bulging..
Forgot to mention this in the last post.
the FK (animation) chain should be set to 0% strenght exept for the hand.
the deform chain should be the deforming chain up to the hand.
Ofcourse the IK chain should not influence anything at all."
Saturday, July 17, 2004
Normal Maps - Plugins
Newtek forum link
Normal Maps for Lightwave
Note that plugin page has links at bottom to discussions on various forums.
Normal Maps for Lightwave
Note that plugin page has links at bottom to discussions on various forums.
How to combine a photo and a cg object
And heres the Newtek forum link which got me there:
Why use skydomes, when you can just use a white backdrop?
Interesting HDRI stuff
Why use skydomes, when you can just use a white backdrop?
Interesting HDRI stuff
Skelegon Editor
Comprised of two parts, Skelegon Editor for Modeler and Skelegon Reader for Layout. Can create and modify skelegons and set parent relationships which do not have to start with the items beginning/end positions. One can even use the knife tool on Skelegons and set goal objects automatically.
Plug-in panel is comprised of three sections: An itemtree which lets you select, rename, hide, display, set goals, set color or otherwise manipulate the skelegons. A GL display with various modes which can also display the background layer, use symmetry and the like and finally a operations area which allows the creation, destruction, operations, information displays and various other options.
Here's BABELFISH
Plug-in panel is comprised of three sections: An itemtree which lets you select, rename, hide, display, set goals, set color or otherwise manipulate the skelegons. A GL display with various modes which can also display the background layer, use symmetry and the like and finally a operations area which allows the creation, destruction, operations, information displays and various other options.
Here's BABELFISH
Friday, July 16, 2004
IK/FK hybrid system
NOTE: This IK/FK hybrid system is still a WIP. I will continue to develop it as I use it in practice (I'm an animator, too.) Here's an example on how to use it: assuming your character is in a T-pose and fully-rigged (I personally use Christopher Lutz's excellent SimpleRigger), turn off full-time IK and make sure the rig still works. Next, select the IK hand control and move the hand along the character's side. Run IK Key on the hand control. Next, select the forearm bone and rotate the forearm so that the hand is at chest level. Run FK Goals on the forearm bone. All the goals should snap back into place and you can continue to use either FK or IK.
IK Key v0.92IK Key, designed specifically for non-full-time IK usage, creates and deletes keys on IK goals and their corresponding IK chains, thus eliminating the need for full-time IK in many cases. To use, select the IK goal and activate the Create IK Key (or the Delete IK Key) generic. You can also use Select IK Chain to select an entire IK chain, which can be useful for editing keyframes in non-full-time IK mode.
FK Goals v0.9FK Goals, designed specifically for non-full-time IK usage, keys an FK rotation and snaps all goals of the IK chain back into place so that you can continue to use IK on the chain. When used in combination with IK Key, it becomes the foundation of a hybrid IK/FK system that will allow you to use IK and FK on the same set of bones on the same frame. To snap all the goals without creating an FK rotation key, turn off Key Current Object.
IK Key v0.92IK Key, designed specifically for non-full-time IK usage, creates and deletes keys on IK goals and their corresponding IK chains, thus eliminating the need for full-time IK in many cases. To use, select the IK goal and activate the Create IK Key (or the Delete IK Key) generic. You can also use Select IK Chain to select an entire IK chain, which can be useful for editing keyframes in non-full-time IK mode.
FK Goals v0.9FK Goals, designed specifically for non-full-time IK usage, keys an FK rotation and snaps all goals of the IK chain back into place so that you can continue to use IK on the chain. When used in combination with IK Key, it becomes the foundation of a hybrid IK/FK system that will allow you to use IK and FK on the same set of bones on the same frame. To snap all the goals without creating an FK rotation key, turn off Key Current Object.
Thursday, July 15, 2004
SILO
New modelling package
$109 US
Looks pretty groovey
- Downloadable demo with 17-day trial period.
- Also learning edition (now at version 1.22) is completely free and has full functionality, though saves are limited to meshes with 100 faces and plugins are disabled.
$109 US
Looks pretty groovey
- Downloadable demo with 17-day trial period.
- Also learning edition (now at version 1.22) is completely free and has full functionality, though saves are limited to meshes with 100 faces and plugins are disabled.
Monday, July 12, 2004
Normal Displacement v.1.2 out
Newtek forum thread:
http://vbulletin.newtek.com/showthread.php?s=&threadid=25645
"Multiple texture layers with alpha did not work correctly, must have once again interpreted the SDK wrong...
I also could reduce memory requirements sigificantly and improve update performance a little.
A new option allows using the normals of the undisplaced mesh, i.e. previous displacement won't affect the normals (however this also includes bones from what i understand)"
http://vbulletin.newtek.com/showthread.php?s=&threadid=25645
"Multiple texture layers with alpha did not work correctly, must have once again interpreted the SDK wrong...
I also could reduce memory requirements sigificantly and improve update performance a little.
A new option allows using the normals of the undisplaced mesh, i.e. previous displacement won't affect the normals (however this also includes bones from what i understand)"
Sunday, July 11, 2004
LW 7 ragdoll thread at Cgtalk
"I was working on a way to simulate some rag doll dynamics in Lightwave without purchasing any plug-ins. We all know that out of the box Lightwave is very power full so I knew it could be done.
Basically it is body segments of a rigid material linked by segments of flexable cloth. It calculates pretty quick and my test dummy reacts well to most things I throw at it. Tell me what you guys think."
And the thread has the settings he used in motion designer
Basically it is body segments of a rigid material linked by segments of flexable cloth. It calculates pretty quick and my test dummy reacts well to most things I throw at it. Tell me what you guys think."
And the thread has the settings he used in motion designer
BOOLDOZER
BOOLDOZER
An "all in one" boolean operation plug-in. It supports all the normal boolean operations and adds functions like 2D booleans and knifing. It also works with objects residing on the same layer and supports boolean subpatch operations. Selection mode, continue, backup, auto-merge.
An "all in one" boolean operation plug-in. It supports all the normal boolean operations and adds functions like 2D booleans and knifing. It also works with objects residing on the same layer and supports boolean subpatch operations. Selection mode, continue, backup, auto-merge.
Wednesday, July 07, 2004
Monday, July 05, 2004
Sunday, July 04, 2004
ANIMEFU
Anime site with reviews etc, has a good search function so you can suss out the titles you saw down at Blockbuster...
How to Finance Independent Animation
An article from AWN about funding and how the hell people manage to do it.
KVAALEN.com
His new site with plugs tutes etc
(The bloke who made Quick Picker PRO, the quick picker that comes with T4D, Expresso)
(The bloke who made Quick Picker PRO, the quick picker that comes with T4D, Expresso)
Friday, July 02, 2004
Thursday, July 01, 2004
TEXTURING threads
I never really looked at the CGtalk texturing forum until today. Oops.
The TEXTURE TUTORIALS and FREE TEXTURES Thread
Skin shading
Human Skin WIP
There's a whole lot more there, but those are a start...
The TEXTURE TUTORIALS and FREE TEXTURES Thread
Skin shading
Human Skin WIP
There's a whole lot more there, but those are a start...
Vertex Colour Maps
cyroz2000 speaks in a cgtalk thread
Vertxpaint allows you to add color weight to vertex and mix this with the standard color map.
"I used vertex paint to make a color map, it adds colors to the mode, you can also assign weight to blend textures (bump, spec, color...).
You can have a look at the vertex color map on the Lightwave3D website:"
"Vertex Color Maps" tute on newtek site
"A vertex color map is VMap type that lets you color the vertices (i.e., points) in your object mesh. The color for areas in between the vertices is averaged. (The Baker surface shader also uses vertex color maps.) You can see the effects of vertex color maps in Flat shade, Smooth shade, and Texture viewport modes. Vertex coloring is multiplied on top of the base surface color with its texture. "
Vertxpaint allows you to add color weight to vertex and mix this with the standard color map.
"I used vertex paint to make a color map, it adds colors to the mode, you can also assign weight to blend textures (bump, spec, color...).
You can have a look at the vertex color map on the Lightwave3D website:"
"Vertex Color Maps" tute on newtek site
"A vertex color map is VMap type that lets you color the vertices (i.e., points) in your object mesh. The color for areas in between the vertices is averaged. (The Baker surface shader also uses vertex color maps.) You can see the effects of vertex color maps in Flat shade, Smooth shade, and Texture viewport modes. Vertex coloring is multiplied on top of the base surface color with its texture. "
Welcome AVRIGUS
My 3D Doommetal buddy from Sydney who has taught me a lot of LW stuff.
Hopefully I can gain some pearls of wisdom from any posts he makes here, and this blog will make it easy to show each other works-in-progress.
PS, get "Hello" thru www.blogger.com ("how to post pictures") it makes it easy - you dont have to resize etc in photoshop, just tell Hello to blog the picture, it makes a thumbnail with a link to the pic on its own page, and asks you what comments you want to add to the post - and you're done.
Hopefully I can gain some pearls of wisdom from any posts he makes here, and this blog will make it easy to show each other works-in-progress.
PS, get "Hello" thru www.blogger.com ("how to post pictures") it makes it easy - you dont have to resize etc in photoshop, just tell Hello to blog the picture, it makes a thumbnail with a link to the pic on its own page, and asks you what comments you want to add to the post - and you're done.
LW8 Manual PDF
Click the link above, sign in with your ID there to get to the "Register NewTek products" page. There are a few boxes running down the page, the top one where you register stuff and then one for each product you have registered online with Newtek. In the bottom left corner of the top box is a "download" link, click that to get to the "downloads" page. Click on the LW8 manual pdf link, **Not right-click save-as**. A little window will pop up telling you its about to download, then you'll get the save/open option window. Save away. It's slow, seems to be down sometimes probably due to bandwidth issues, every man and his dog is trying to download it RIGHT NOW and simultaneuosly whingeing on 4 different forums at once.
The printed manual is $100 US, I have a sinking feeling I will have to order it even though my reseller assumed I would get one mailed to me. I think he was overly optimistic. I gather from forum chatter that the pdf download is the manual only, pay $100 for the printed version and you get an "exclusive" printed "tutorial manual" as well.
The printed manual is $100 US, I have a sinking feeling I will have to order it even though my reseller assumed I would get one mailed to me. I think he was overly optimistic. I gather from forum chatter that the pdf download is the manual only, pay $100 for the printed version and you get an "exclusive" printed "tutorial manual" as well.

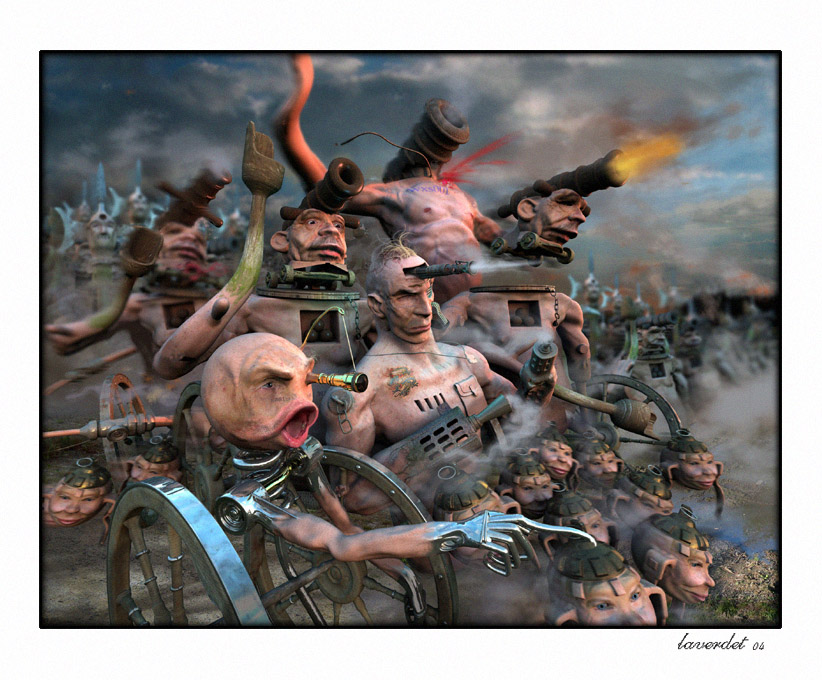
Zbrush->LW->Fprime
Zbrush->LW workflow threads are always an interesting read, this is no exception, and links to some insanely cool work rendered with Fprime, of HR Giger's Alien.
Wednesday, June 30, 2004


SHREK 2
.. was pretty good. The kids loved it. I kept nodding off, after a long dayshift at work.
Anyway the animation was cool, especially the girl shrek. Some of the humans sometimes look a bit POSERy, like "CG human", but when they got the CARTOONY cg human look down it worked a treat. The script was cool, they tied in every fairytale cliche in a good way, and it is better and richer than the first film.
But there are a few things towards the end that feel tacked on scriptwise, and I still feel Dreamworks cant quite pull it off as well as PIXAR. The CG look they get doesnt quite pull you in enough, you're always thinking "Oh it's CG" instead of being immersed in the story, and you never forget it's a big name actor, so there's that making it hard to accept the characters 100%.
Great school holidays kids film, I can see why it's doing so well @ box office, but from 3D nerd standpoint comparing it to Nemo is like comparing Antz to Bugs Life. No contest.
Saw trailers for Shark Tale - REALLY the "Antz" to Pixars Nemo, but the kids will love it and Scorcese's scene with De Niro looked funny. Also THE INCREDIBLES which looks pretty bloody amazing in terms of character design, script, dialogue, performance - like everything that worked for me on Monsters Inc taken to the Nth degree, AND in the family lineup pose they look like the old Fantastic 4 - this one will really hit a chord with both generations, Saturday morning cartoon nostalgia here we come.
Anyway the animation was cool, especially the girl shrek. Some of the humans sometimes look a bit POSERy, like "CG human", but when they got the CARTOONY cg human look down it worked a treat. The script was cool, they tied in every fairytale cliche in a good way, and it is better and richer than the first film.
But there are a few things towards the end that feel tacked on scriptwise, and I still feel Dreamworks cant quite pull it off as well as PIXAR. The CG look they get doesnt quite pull you in enough, you're always thinking "Oh it's CG" instead of being immersed in the story, and you never forget it's a big name actor, so there's that making it hard to accept the characters 100%.
Great school holidays kids film, I can see why it's doing so well @ box office, but from 3D nerd standpoint comparing it to Nemo is like comparing Antz to Bugs Life. No contest.
Saw trailers for Shark Tale - REALLY the "Antz" to Pixars Nemo, but the kids will love it and Scorcese's scene with De Niro looked funny. Also THE INCREDIBLES which looks pretty bloody amazing in terms of character design, script, dialogue, performance - like everything that worked for me on Monsters Inc taken to the Nth degree, AND in the family lineup pose they look like the old Fantastic 4 - this one will really hit a chord with both generations, Saturday morning cartoon nostalgia here we come.
TEXTURE
Texturing thread on CGtalk worth checking out (step by step run through)
The SHIROW guys want me to get up to speed on texturing, which will do me good. Not as rock star as modelling or character animation, but I need to learn it for my own stuff so it's a good deal.
AND here's the Spinquad version of the same thread,
Has some texturing tute links worth looking into:
The SHIROW guys want me to get up to speed on texturing, which will do me good. Not as rock star as modelling or character animation, but I need to learn it for my own stuff so it's a good deal.
AND here's the Spinquad version of the same thread,
Has some texturing tute links worth looking into:
Subscribe to:
Posts (Atom)